Tutorial: How To Build A Kayak Trailer
How To Build A Kayak Trailer
At-least every second day we receive phone calls from potential customers looking for guidance on how to build a kayak & canoe trailer using boat trailer parts? and if our blue HDPE plastic skids are suitable to help launch and retrieve their kayaks.
This tutorial will help guide you on building a custom trailer that will help transport, launch & retrieve your kayak with ease.
Before you get started on your new kayak trailer there is a couple of things that you will need to get you started. A canoe or small boat trailer which has the basics still attached. Tyres, tail lights in particular. The rest we will add later on to complete our new design.
- First up you will need to strip the rollers, boat skids, trailer winch and any other parts connected frame of the trailer, test your brake lights, reverse lights and turn signals and make sure the tires are in a roadworthy condition.
- Next. Weld two uprights in the front and the back of the trailer’s frame as shown in step 2 picture located below this guide. The upright posts should be approximately 6 to 8 feet tall and made from 2×2 steel tube.
- Once you have completed the above steps you will then need to weld the cross members in place on the front upright post. These can be 1×2 tube steel. Weld the bottom cross members four to six inches above the base of the trailer. This may vary depending on how deep you plan to make your equipment locker. Space them two feet or more apart depending on your kayak’s keel.
- Weld the cross members to the rear of the trailer using the same steps as above.
- Once this is complete you will then need to weld a ridge pole made of 1×2 tube steel between the tops of the uprights running lengthwise down your new trailer.
- To add extra support to your trailer which will help support the weight of your kayak or canoe you will need to cut 6 inch triangular gusset plates of 1/4 or 1/8 inch steel plate and clamp them point down in place under the cross-trees and also against the uprights as shown in the picture guide below. This will ensure extra strength so that your trailer does not collapse on you while in transit.
- Weld the gussets into place. Run a weld bead along the top of the gusset underneath the cross members as shown in the diagram. Next run a bead along either side of the upright to attach the gusset to the upright. Cut two right angle triangles and weld them under the ridge support cross member and to the upright as shown in the diagram. This will give lateral support to the frame so it doesn’t wobble front to back.
- It is not time to make an equipment locker for your new trailer. First cut a sheet of marine grade plywood into a box shape with top lid, sides and of course a bottom. Measure the inside of the frame and build the box to fit inside the frame below the bottom cross-tree. Screw the bottom, sides and bottom of the box together, hinge and hasp the lid, and paint the box and bolt it to the inside of the trailer frame.
- Drill ,bolt or weld eye bolts to the outside of the cross members to provide attachment points for bungees or ratchet tie-downs. Add a row of eye bolts where the cross-trees and uprights cross. This will allow you to tie one end to the center eye bolt, throw the tie-down over the hull of the boat and cinch it down to the outside eye bolt. This will ensure your kayak is nice and secure to your trailer.
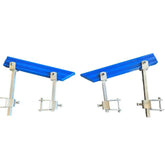
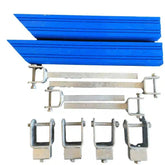
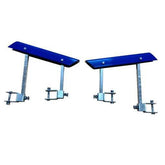
- Lastly, attach some plastic skids to the cross-trees. counter sink the skids to the steel to hold them in place. The skids will protect the hull and gunwales of your canoe or kayak from damage and help launching and retrieving your kayak alot easier.
Options Accessories:
- Trailer Jockey Wheel.
- Trailer Brackets.
- Trailer Bumper Cover / C-Section Profiles.
- Parallel Trailer Rollers.
- Concave Trailer Rollers.
Step by step image user guide:
Disclaimer: Kayak user guide thanks to the guys at twayneking on hubpages. All questions and information related to this guide should be directed to the author twayneking.
Kayak images supplied from Savage Trailers.


